WordPress on Docker in Production - Unofficial Quickstart Tutorial / Guide
Introduction
Docker is a great technology which can be used for many purposes. One purpose for using Docker is to deploy WordPress. This tutorial covers deploying multiple WordPress websites on Docker. For this demo we are deploying etopian.com, replace that with your custom domain.
Our custom Docker image
The following is a quick tutorial for deploying your site on Docker. It has been tested and works with sites like www.etopian.com. It also supports using an SSL certificate. It uses Alpine Linux for serving the actual site, the beautiful thing is that a site can be served in around 50mb of ram. Using the process below you can deploy multiple WP sites on the same box, at least 10 sites on a 1gb VPS extremely securely as each site lives in its own container. This container uses Alpine Linux Edge with PHP7. We have found this to be a stable solution, despite being Edge being the testing branch of Alpine Linux. Our image on github.
Security
The process serving the website, Nginx and PHP-FPM, does not run as root. It's no less secure than running a non-root user like www-data to serve your site. If you can breakout to root within the container, you can potentially get to the host system. But that's absolutely no different than any other Linux system. If you break out of www-data on a normal setup to root, then you have root. See Why use Docker with WordPress for more.
Design decisions
We do not use Docker's volume feature. Instead all files including the MariaDB data directory are bind mounted directly from the host. All your files are on the host in the /data directory. This helps with backups and is generally a safe way of dealing with files while dealing with Docker. Let's for instance assume that Docker fails to start and you need to rescue your sites. This way all your files including your database are in /data. If you would use Docker's volumes feature then you would not have any access to any of the sites files. All the NGINX config directories are mounted to /etc/nginx on the host for easy editing and management.
Each WordPress Container contains:
- Nginx
- PHP-FPM
- WP-CLI
- git
- Rsync
- Vim
- Bash
File upload size limit is 2GB
Currently there is no process manager running in the WordPress container, not that this affects things much. We have it on our todo list to use s6 as the process manager. The nginx user is enabled on each container so you can bash into the container as the same user as the site, to use wp-cli. This is a minor security risk. Currrently there is no way to directly SSH into the container, you have to go through the host. There are no plans to add SSH to the container, you have to that yourself if that's something you need.
Install Docker
First install Docker. We are using Docker 1.12.3. We are running Ubuntu Xenial 16.04 LTS
Prepare your WordPress site
Site files need to be located in /data/sites/etopian.com/htdocs, simply copy the files here:
mkdir -p /data/sites/etopian.com/htdocs
#Copy your WP install here, if you don't have one simply download WP and put that here
/data/sites/etopian.com/htdocs
File ownership
The site on your host needs proper file permissions. Go to your site's folder and type the following:
chown -R 100:101 htdocs/
If you are using this image for development on a Linux box, then you will want to edit these files as a different user. You can do that using the following command:
setfacl -Rm u:<user>:rwX,g:<user>:rwX,d:g:<user>:rwX /data/sites/<site-domain>.com
Replace the tokens with their appropriate replacements.
Run NGINX Reverse Proxy Container
This sits in front of all of your sites at port 80 and 443 serving all your sites. It was automatically reconfigure itself and reload itself when you create a new WordPress site container.
docker run -d --name nginx -p 80:80 -p 443:443 -v /etc/nginx/htpasswd:/etc/nginx/htpasswd -v /etc/nginx/vhost.d:/etc/nginx/vhost.d:ro -v /etc/nginx/certs:/etc/nginx/certs -v /var/run/docker.sock:/tmp/docker.sock:ro etopian/nginx-proxy
Run WordPress Container
Each site runs in its own container with PHP-FPM and Nginx instance.
docker run -d --name etopian_com -e VIRTUAL_HOST=www.etopian.com,etopian.com -v /data/sites/etopian.com:/DATA etopian/alpine-php-wordpress
If you use SSL you need to run your container with the filename of the certificate you are using.
-e CERT_NAME=etopian.com
Put your SSL certificate here, with the VIRTUAL_HOST as the file name:
/etc/nginx/certs
etopian.com.crt  etopian.com.csr  etopian.com.key
Also check the wp-config section for information on how to modify your wp-config file if you are using SSL/TLS.
Run MySQL/MariaDB Database Container
In order to access MySQL/MariaDB running in a container you need a MySQL client on your host. You can alternatively using the client in the container, described below.
Install MariaDB
docker run -d --name mariadb -p 172.17.0.1:3306:3306 -e MYSQL_ROOT_PASSWORD=myROOTPASSOWRD -v /data/mysql:/var/lib/mysql mariadb
Use MySQL from the host
apt-get update && apt-get install mariadb-client-10.0

#login to mariadb
mysql -uroot -pmyROOTPASSOWRD -h 172.17.0.1 -P 3306

#create the db in mariadb
CREATE DATABASE etopian_com;
CREATE USER 'etopian_com'@'%' IDENTIFIED BY 'mydbpass';
GRANT ALL PRIVILEGES ON  etopian_com.* TO 'etopian_com'@'%';

#if you have a db, import it. if not then configure wp and install it using the interface.
mysql -uroot -pmyROOTPASSOWRD -h 172.17.0.1 etopian_com < mydatabase.mysql
Use MySQL client in the container image
docker cp mydatabase.sql mariadb:/tmp/mydatabase.mysql
docker exec -it mariadb bash
export TERM=xterm
cd /tmp
mysql -uroot -pmyROOTPASSOWRD < mydatabase.mysql
Configure WordPress
wp-config.php
If you need to change the domain of the site put the follow in wp-config.php of your site.
/** The name of the database for WordPress **/
define('DB_NAME', 'etopian_com");

/** MySQL database username **/
define('DB_USER', 'etopian_com');

/** MySQL database password **/
define('DB_PASSWORD', 'mydbpass');

/** MySQL hostname **/
define('DB_HOST', '172.17.0.1');
Your site should be working as long as the DNS entries are properly set.
wp-config.php - SSL
Put your SSL certificate here, with the VIRTUAL_HOST as the file name:
/etc/nginx/certs
etopian.com.crt  etopian.com.csr  etopian.com.key
If you use SSL you need to run your container with the filename of the certificate you are using. So rm the existing container and recreate a new one with the following environmental variable.
-e CERT_NAME=etopian.com
edit wp-config.php in your site's htdocs directory.
define('WP_HOME','https://etopian.com');
define('WP_SITEURL','https://etopian.com');
  define('FORCE_SSL_ADMIN', true);
if ($_SERVER['HTTP_X_FORWARDED_PROTO'] == 'https')
       $_SERVER['HTTPS']='on';
wp-config.php
If you need to change the domain of the site put the follow in wp-config.php of your site.
define('WP_HOME','http://etopian.com');
define('WP_SITEURL','http://etopian.com');
Mail is not routed by the container, you must use an SMTP plugin or Mailgun or AWS SES to route your site's email.
The reason that mail is not routed is because configuring mail to route from the proper domain on a server is often a headache. A further headache is actualty getting mail delivered from an arbitrary IP. A third issue is that mail servers consume resources. A fourth issue is security. So for all these reasons we decided not to implement mail and instead delegate that task to various providers like Mailgun.
Mailgun WP Plugin works fine in the container but the test to see if it is working will fail because it does not correctly set the e-mail address before attempting to send an e-mail. Simply ignore the error, and test the mail from your actual site to make sure it's working.
- https://wordpress.org/plugins/mailgun/ (recommended)
- https://wordpress.org/plugins/wp-ses/
- https://wordpress.org/plugins/wp-smtp/
- https://wordpress.org/plugins/easy-wp-smtp/
- https://wordpress.org/plugins/wp-mail-bank/
Logs
You can view the logs of all your sites using the NGINX proxy container.
docker logs nginx
If you want to view logs for an individual site, they are in the logs directory on your host.
cd /data/sites/etopian.com/logs
cat access.log
WP-CLI
WP-CLI is included in the Alpine Linux image. To use it from inside the container in a safe way.
docker exec -it <container_name> bash
su nginx
cd /DATA
wp-cli
Redis
It is possible to speed up your site with Redis... You need enough memory to support Redis obviously.
You need the following WP plugin: https://wordpress.org/plugins/redis-cache/
Put this in your wp-config.php below the DB_HOST and DB_NAME entries.
define('WP_REDIS_HOST', DB_HOST);
define('WP_CACHE_KEY_SALT', DB_NAME);
Deploy Redis
docker run --name redis -p 172.17.0.1:6379:6379 redis
Go to your site's dashboard and activate the Redis object cache.
Settings > Redis and click the button to activate.
Modifying the image
The image for Alpine Linux running PHP may be found here: https://github.com/etopian/alpine-php-wordpress
You may fork it and modify it to add additional modules and what not.
Adding new PHP modules
The following modules are included with the image etopian/alpine-php-wordpress
    php7-fpm php7-json php7-zlib php7-xml php7-pdo php7-phar php7-openssl \
    php7-pdo_mysql php7-mysqli php7-session \
    php7-gd php7-iconv php7-mcrypt \
    php7-curl php7-opcache php7-ctype php7-apcu \
    php7-intl php7-bcmath php7-dom php7-xmlreader
List of PHP Modules
List of available modules in Alpine Linux, not all these are installed.
In order to install a php module do, (leave out the version number i.e. -5.7.0.13-r0
docker exec <container_name> apk add <pkg_name>
docker restart <container_name>
Example:
docker exec <container_name> apk update #do this once.
docker exec <container_name> apk add php-soap
docker restart <container_name>
php7-intl
php7-openssl
php7-dba
php7-sqlite3
php7-pear
php7-phpdbg
php7-litespeed
php7-gmp
php7-pdo_mysql
php7-pcntl
php7-common
php7-oauth
php7-xsl
php7-fpm
php7-gmagick
php7-mysqlnd
php7-enchant
php7-solr
php7-uuid
php7-pspell
php7-ast
php7-redis
php7-snmp
php7-doc
php7-mbstring
php7-lzf
php7-timezonedb
php7-dev
php7-xmlrpc
php7-rdkafka
php7-stats
php7-embed
php7-xmlreader
php7-pdo_sqlite
php7-exif
php7-msgpack
php7-opcache
php7-ldap
php7-posix
php7-session
php7-gd
php7-gettext
php7-mailparse
php7-json
php7-xml
php7-mongodb
php7
php7-iconv
php7-sysvshm
php7-curl
php7-shmop
php7-odbc
php7-phar
php7-pdo_pgsql
php7-imap
php7-pdo_dblib
php7-pgsql
php7-pdo_odbc
php7-xdebug
php7-zip
php7-apache2
php7-cgi
php7-ctype
php7-inotify
php7-couchbase
php7-amqp
php7-mcrypt
php7-readline
php7-wddx
php7-cassandra
php7-libsodium
php7-bcmath
php7-calendar
php7-tidy
php7-dom
php7-sockets
php7-zmq
php7-memcached
php7-soap
php7-apcu
php7-sysvmsg
php7-zlib
php7-ssh2
php7-ftp
php7-sysvsem
php7-pdo
php7-bz2
php7-mysqli
Docker WordPress Control Panel
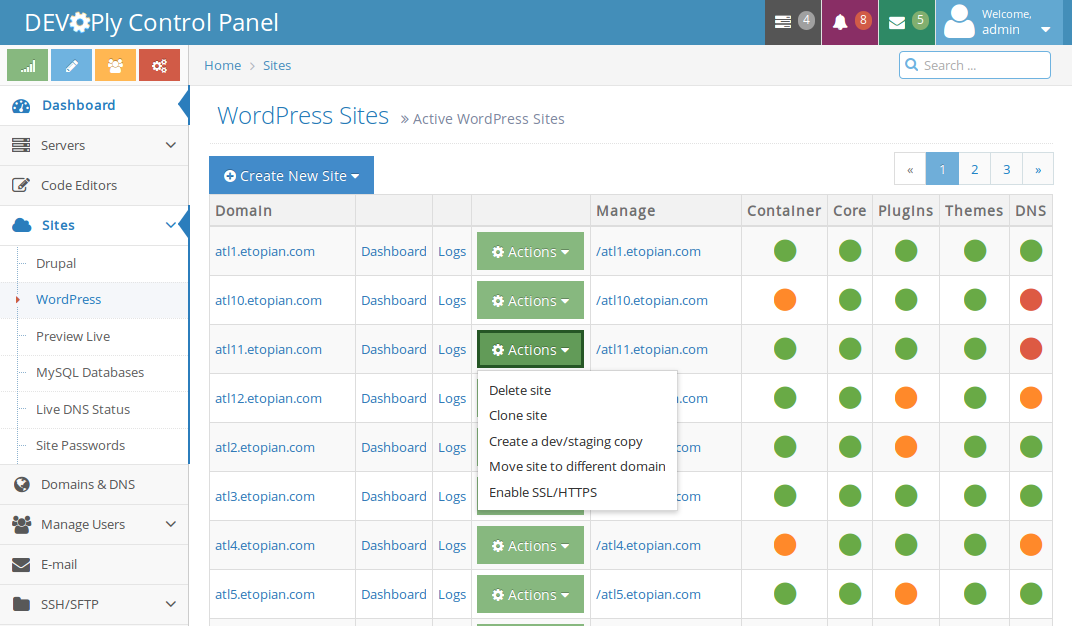
DEVOPly is a hosting control panel which does everything taught in this tutorial automatically and much more, backups, staging/dev/prod, code editor, Github/Bitbucket deployments, DNS, WordPress Management. https://www.devoply.com!
Firewall
You should also deploy a firewall on your box. However, it's very easy to lock yourself out of your box, so I will not give you exact instructions on how to do it. The following is what I use for my box using arno-iptables-firewall.
Once the firewall is in place, notice when the box reboots, Docker might not start in the right order and therefore the iptables rules it might need might not be initialized and due to this things might not work. Simply restart the Docker service:
service docker restart
#######################################################################
# Feel free to edit this file.  However, be aware that debconf writes #
# to (and reads from) this file too.  In case of doubt, only use      #
# 'dpkg-reconfigure -plow arno-iptables-firewall' to edit this file.  #
# If you really don't want to use debconf, or if you have specific    #
# needs, you're likely better off using placing an additional         #
# configuration snippet into/etc/arno-iptables-firewall/conf.d/.      #
# Also see README.Debian.                                             #
#######################################################################


EXT_IF="eth0"
EXT_IF_DHCP_IP=1
OPEN_TCP="22 80 443"
OPEN_UDP=""
INT_IF="docker0"
NAT=1
INTERNAL_NET="172.17.0.1/16"
NAT_INTERNAL_NET="192.168.1.0/24 192.168.2.0/24 172.17.0.1/16"
OPEN_ICMP=1
Have issues, comments or questions: Join us on Gitter
Docker DOES NOT own, operate, license, sponsors or authorizes this site. Docker® is a registered trademark of Docker, Inc. Similarly, WordPress Foundation DOES NOT own, operate, license, sponsors or authorizes this site. WordPress® is a registered trademark of WordPress Foundation. wordpressdocker.com Unofficial WordPress Docker Tutorial is not affiliated with Docker, Inc or WordPress Foundation. This site is a not for profit tutorial made available free of charge.